Pre-requisites
If you don’t have a Polygona account yet, you’ll need to sign up and create one by visiting the Polygona signup page.1. Set Up Your Domain(s)
After logging in, you’ll need to set up your domain to use the Polygona API. Normally, a popup will appear when you first log in, prompting you to add your domain. If you missed this step, you can manually add your domain by following these steps:- Navigate to the “API Keys” tab in your Polygona dashboard.
- Add your website’s domain to the list of authorized domains (you can add up to 2 domains):
- Click the save icon to save your changes.
2. Upload Your 3D Model
Now, let’s upload your Blender 3D model:- Go to the “Projects” tab in your dashboard.
- Click “New Project” to create a new project.
- Select your Blender file (.blend) from your computer.
- Wait for the upload and processing to complete. This may take a few minutes depending on the complexity of your model.
4. Set and Adjust Parameters
Once your model is uploaded, you should automatically be redirected to the “Edit Project” page: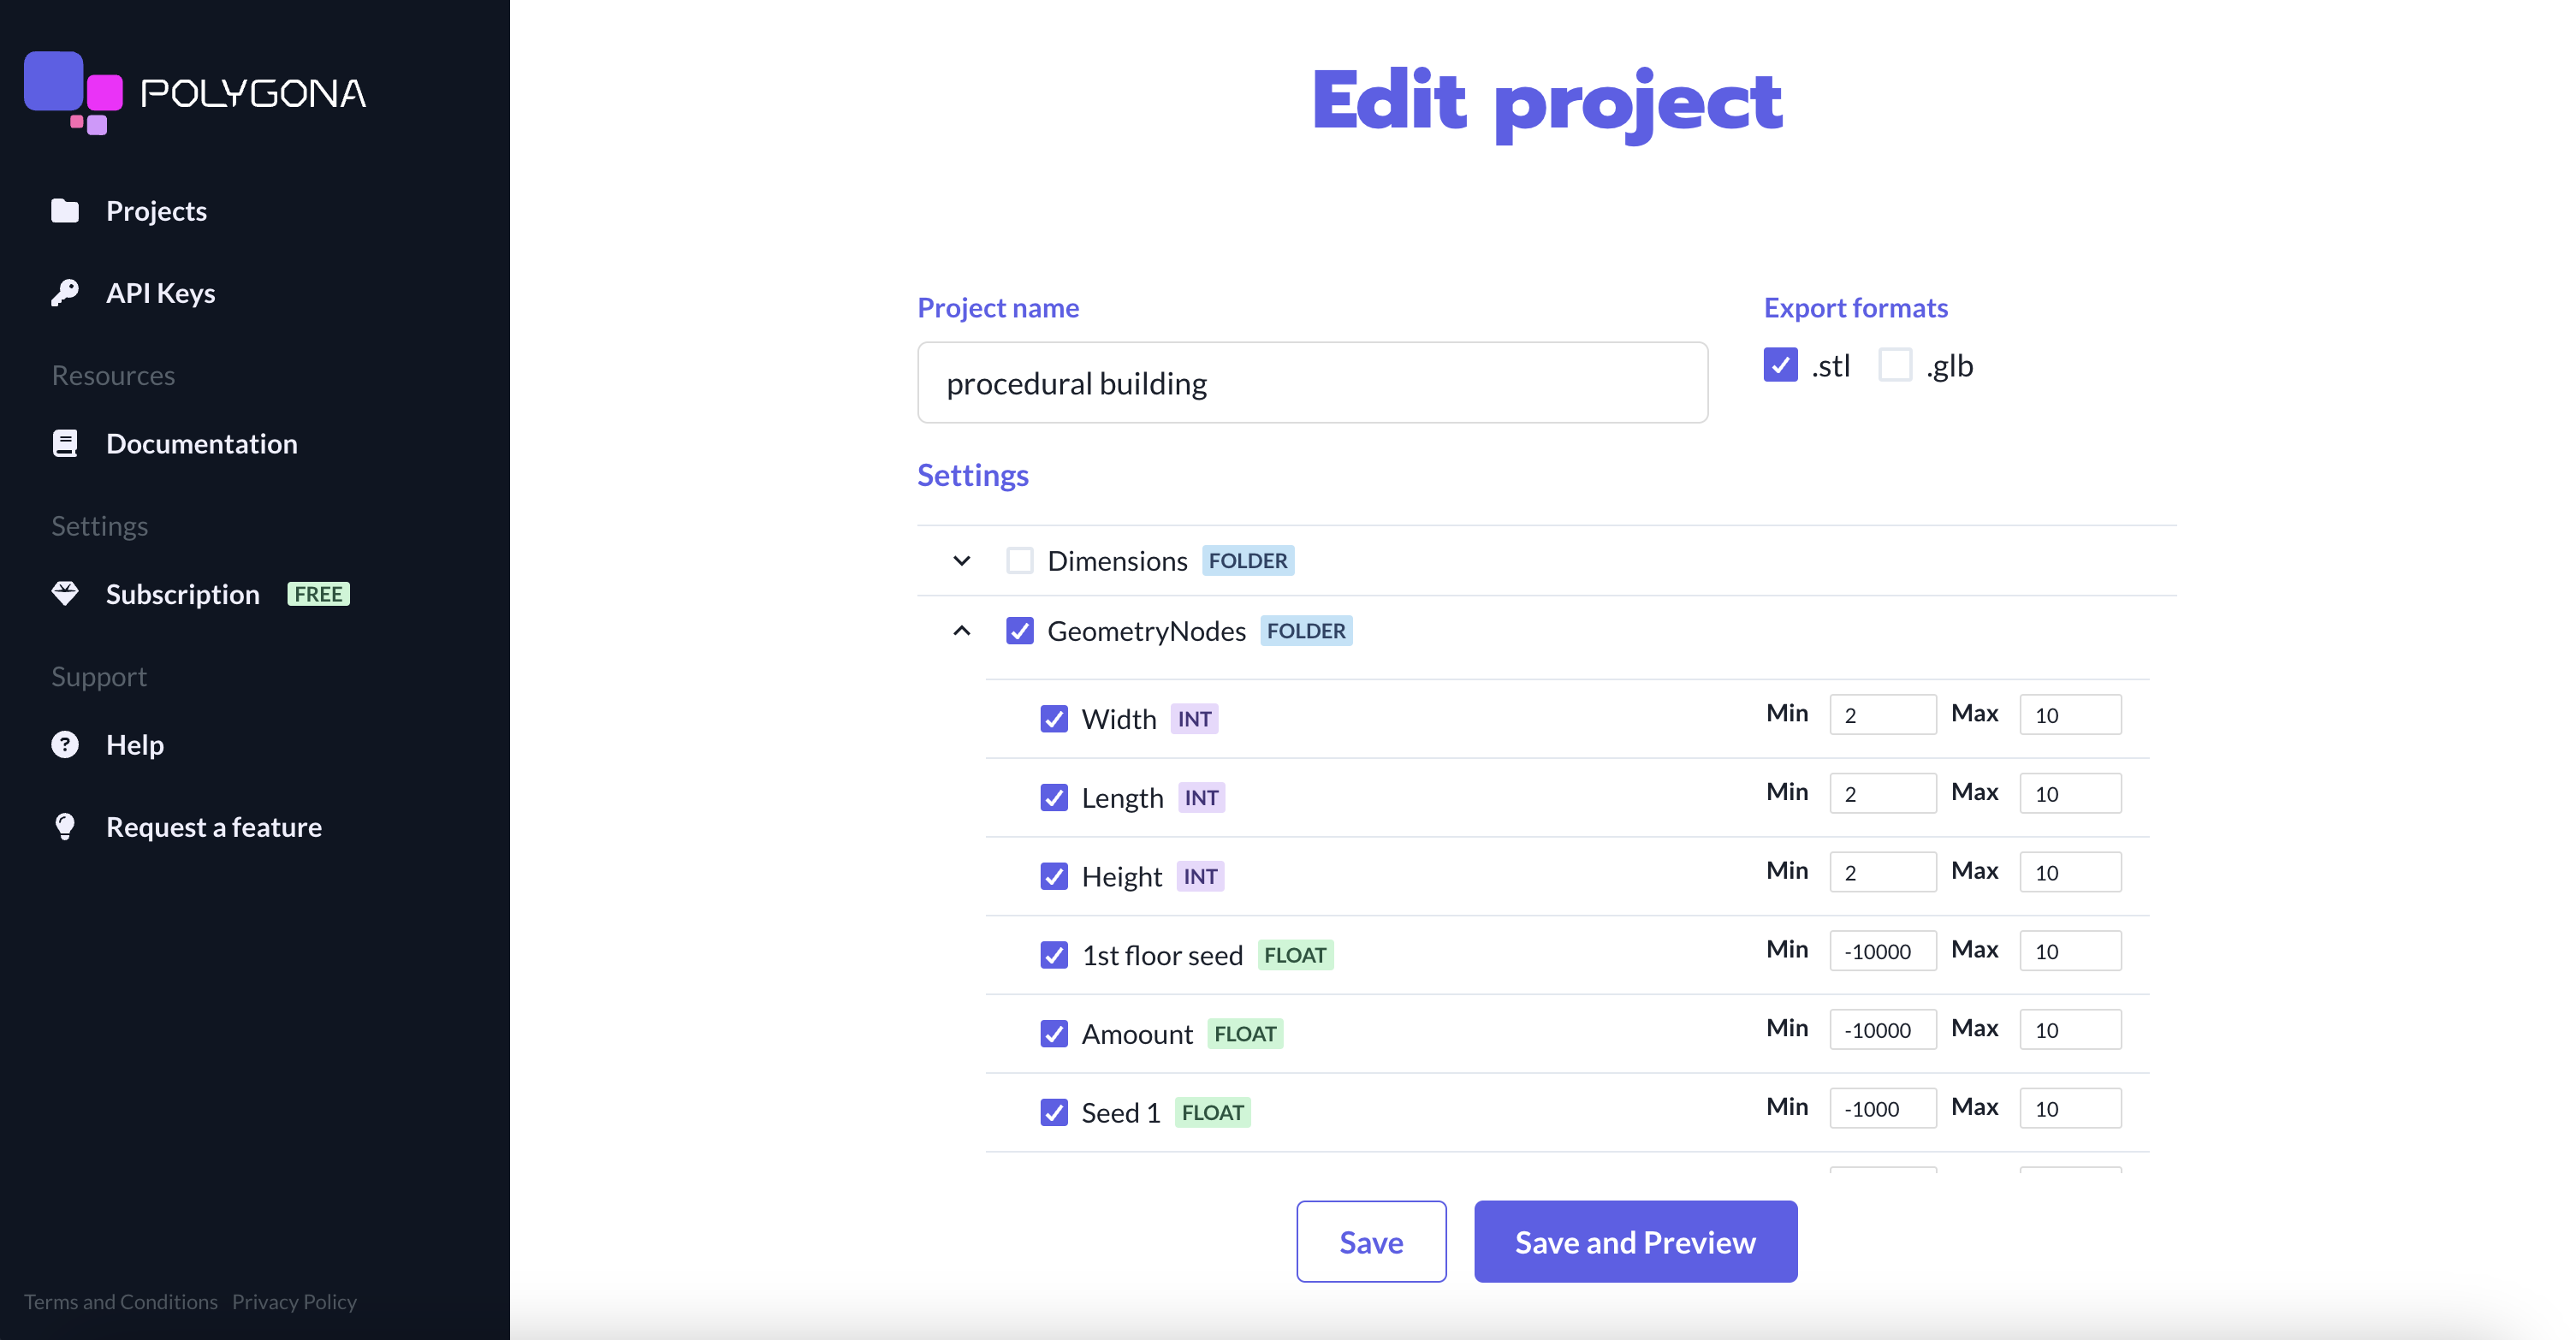
- Update the project name.
- Update export formats (STL is selected by default).
- Select and adjust the parameters you want to expose to your users for customization.
- Click Save to save your changes and go back to the project list, or click Save & Preview to see how your model will look in the viewer.
5. Embed in Your Website
Now you’re ready to embed your 3D model viewer in your website:- Go to the “Projects” tab in your dashboard.
- Click on icon on the top-right corner of the project you want to embed.
- Select the platform you’re using (e.g. React, Shopify).
- Copy the embed code and follow the instructions to embed it on your website.
'YOUR_API_KEY' with your actual API key and 'YOUR_PROJECT_ID' with the project ID of the model you want to embed.
Next Steps
Congratulations! You’ve successfully set up Polygona on your website. Here are some next steps you might want to explore:Prepare Your Blender Files
Learn how to prepare your Blender 3D files for optimal use with Polygona
React
Embed Polygona’s 3D customizer in your React applications